


The Fabricator’s Guide to 3M™ PSA Self-Adhesive Backed Sheets for Rapid Refacing
If you have never worked with wood veneer sheets before, jumping into your first project can feel a little intimidating. Traditional veneer application methods—requiring independent contact cement layouts, spray booths, vacuum presses, or multi-hour clamping cycles—require you to learn how to mix adhesives and operate expensive, specialized shop machinery. That is a lot of information to digest, and it is completely understandable to feel overwhelmed.
Fortunately, there are things you can do to make the process straightforward and accessible. At Oakwood Veneer, we manufacture premium peel and stick wood veneer sheets—also frequently called sticky-back or self-stick veneer. By pairing elite, face-grade wood flitches with an industrial-strength, factory-applied 3M™ Pressure Sensitive Adhesive (PSA) backing, we deliver a self-adhesive surfacing solution that slashes installation labor by up to 50% while guaranteeing a permanent, unbreakable bond. While it is a premium upgrade option compared to paper-backed sheets, it eliminates the need for specialized equipment, making it the ultimate selection for small projects, quick refacing runs, and installers looking for a more straightforward application.
Top Reasons Why Custom Shops Choose 3M™ PSA Veneer
Whether your team is tackling an on-site luxury kitchen cabinet refacing contract, a retail store fixture rollout, or a small custom furniture piece, self-adhesive veneer sheets offer unmatched operational advantages:
-
Eliminate Toxic Adhesive Overhead: You don't need to learn about different types of adhesives, figure out which one is appropriate, or mix messy glues. The PSA backer arrives ready to apply right out of the box.
-
No Expensive Equipment Required: Experienced woodworkers often advocate for expensive vacuum presses to apply raw or paper-backed sheets. With self-stick veneer, you don't need specialized tooling—just a rigid veneer scraper. You can even improvise your own scraper on the shop floor by sanding a smooth radius onto the edge of a scrap piece of wood.
-
Technically Repositionable: If you place the sheet down and your alignment is ever-so-slightly off, you can carefully pull it up and reapply it before the industrial adhesive fully cures and sets. This provides an excellent safety net for beginners who have little experience positioning large sheets.
Versatile Applications for Sticky-Back Veneer
Our real wood peel and stick wood veneer is highly versatile and used across a massive range of commercial and residential woodworking projects, including:
-
Cabinet Refacing: Giving older kitchen frames or bath vanities a premium face-lift without tearing out the casework.
-
Furniture Refinishing: Restoring worn-out dresser tops, desk surfaces, and heirloom tables.
-
Acoustic Speakers & Media Centers: Wrapping custom audio enclosures in rich, warm wood grains.
-
Instrument Accents: Ornamenting custom guitars, piano trim, and musical equipment.
-
Inlays & Marquetry: Crafting detailed artistic patterns (plus, your leftover scraps are perfect for odd crafts and smaller inlay details).
Step-by-Step Success: How to Apply Peel-and-Stick Veneer
To achieve a flawless, permanent bond that stands the test of time, follow this professional application sequence:
1. Surface Preparation (The Most Critical Step)
PSA requires a clean, stable, and flat core substrate. MDF is ideal, followed by other synthetics, fine-sanded hardwood plywood, or sealed solid wood frames.
-
Clean and dry the entire substrate surface completely.
-
Lightly sand the surface with 180-grit sandpaper to create a subtle mechanical key for the adhesive.
-
Thoroughly wipe or vacuum away all dust and particulate matter. The substrate must be 100% free of debris before proceeding.
2. Sizing and Acclimation
Allow your veneer sheets and your core substrates to acclimate in the same climate-controlled room for at least 48 hours. When cutting your sheet, always cut it slightly larger than the face of the substrate you are covering. This extra overhang gives you a comfortable margin for error during placement, eliminating the stress of trying to align the sheet perfectly on the first touch.
Pro-Tip for High-Humidity Environments: If your project is being installed in an area prone to high humidity fluctuations, you can secure an even stronger, climate-resistant bond by applying a layer of water-based contact cement to the substrate core only prior to laying down the PSA sheet.
3. Pressing Out Trapped Air
Once the veneer sheet is positioned, apply heavy, firm pressure starting directly from the center and working your way outwards to the edges. Use your scraper tool to force out any trapped air and prevent bubbles from forming. Press down hard—the adhesive is pressure-activated, meaning physical compression forces the sticky molecules to lock permanently into the substrate pores.
4. Clean Trimming and Finishing
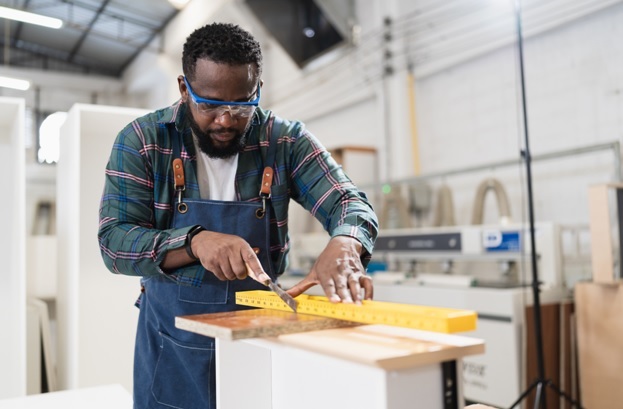
To trim away the excess overhang, use an extremely sharp utility knife or razor blade. Always score the surface of the wood veneer lightly a few times before making your final deep cut. This prevents grain tear-out and ensures a crisp, professional edge line.
-
If the trimmed edge feels a bit sharp to the touch, run over it very lightly with fine-grit sandpaper.
-
Finish your new panel exactly like you would any other piece of solid hardwood. Sand the face by hand to completely prevent accidental sand-through, then apply your choice of wood stain, sealer, or clear topcoat.
Core Selection & Technical Specifications
To ensure maximum structural stability across highly figured or wild grain species, we balance our active manufacturing inventory across distinct architectural backers.
While our online standard checkout is optimized for our thickest, most forgiving substrate barrier—$4 \times 8$ dimensions paired with our heavy-duty 22.2-Mil Bubble-Free (BFV) backer—our factory processes 3M™ Pressure Sensitive Adhesive (PSA) layups for over 300 unique wood species (including beautiful burls, cherry, maple, oak, and rare exotics) via direct phone order.
| Backer Configuration | Best Operational Application | Finished Backer Thickness | Availability Profile |
| 3M™ Pressure Sensitive (PSA) | Fast on-site cabinet refacing, curved architectural millwork, reception desk columns, and instrument refacing. | .023" to .026" (~1/40") | Premium Upgrade (Call Factory to Order) |
| 22.2-Mil Bubble-Free (BFV) | Large, flat desktop runs, commercial wall paneling, and doors where substrate imperfections must be absorbed. | .026" to .029" (~1/35") | Online Checkout Standard |
| 10-Mil Paper Backer | Traditional cold-press and vacuum-press shop layups using standard woodworking PVA glues. | .022" to .025" (~1/40") | Standard Utility (Call Factory to Order) |
Questions Before Getting Started with Peel-and-Stick Veneer?
Do you still have questions about how to properly prep your substrate, trim your overhang, or choose the right wood species for your layout? Our knowledgeable factory staff is right here in Troy, Michigan, ready to guide you through your purchase and installation.
Call us directly at (800) 426-6018 between 8:30 AM and 5:00 PM EST, and we will be happy to help you get started on your next project!