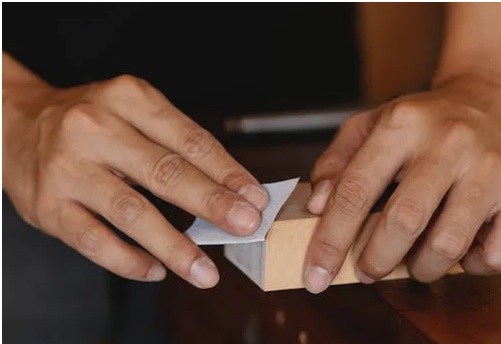
Some veneer projects are hardly complete without the polished look of properly applied and finished edgebanding.
But what is edgebanding and how is it applied?
What Is Wood Veneer Edgebanding?
Edgebanding is a special type of wood veneer that consists of very thin strips of wood veneer, which are typically finished with some sort of adhesive backer.
Edgebanding is applied to the sides of the substrate, where it is exposed, to complete the look of the finished product and to further protect it.
For instance, if you finished an MDF table, shelf, or bookcase with a surface of walnut veneer, it would make sense to use walnut edgebanding tape around the edge to enhance the aesthetics of the finished piece.
One of the great things about edgebanding is that it can be used to hide the edge of a plywood board, making plywood a viable option for making furniture, as well as for a variety of other uses.
Types of Edgebanding Backer Available
Here at Oakwood Veneer, we sell edgebanding in two primary configurations: pre-glued or fleece-backed.
One version is pre-glued, meaning it is effectively ready to apply once you prepare your substrate and workspace.
The other is “fleece-backed.” Fleece backer is a flexible, durable material that is typically used with automatic edge banding machines When paired with a suitable adhesive, fleece-backed edgebanding allows easy application onto most appropriate substrates Note: some people refer to fleece-backed edgebanding as “auto edge banding.”
How to Apply Walnut Edgebanding
Before you apply edgebanding, you need to sand (if necessary) and clean your substrate surface. It must be clean, dry, and entirely free of residues or particulate matter, or else this will adversely impact proper adhesion. It also must be perfectly flat and even or else it will be difficult to apply the edgebanding properly and it may not adhere satisfactorily.
Then, you’ll need to take a simple measurement to ensure that you’re using enough material.
A good rule of thumb is to add a little extra, say, ½” end on either end, to ensure that you have enough edgebanding to complete the project. Then you can go back later and trim the ends with either a flush cutter or a razor.
After cutting your edgebanding to length, place it over the surface of the substrate edge. There should be a slight overhang over both edges, as well as over the top and bottom.
If you’re using pre-glued (or some other heat-activated hot melt adhesive) edgebanding tape, you will need a heat source like an iron. An iron is preferable because it can apply both a consistent temperature and pressure, which are necessary to ensure proper adhesion.
It is important to use the right heat setting, since edgebanding adhesive is heat sensitive; if you do not adequately activate the adhesive, the edgebanding will not adhere properly and will peel off. A temperature of 400℉ is advisable, so whatever setting on your iron delivers that temperature is the one to use.
Apply even pressure with the iron move it slowly over the surface of the edgebanding from one end to the other. Wear gloves or use a tool to keep the free end of the edgebanding pressed firmly to the edge; it must be held securely in place while applying but you don’t want to touch the surface you just passed over with bare hands as it will remain hot for 30 seconds or longer.
After you have gone over the flat surface of the edgebanding, to ensure proper adhesion along the top and bottom edge, tilt the iron and press it into the edge. This presses the edgebanding into the corner of the edge and helps prevent it from peeling up. Pay particular attention along the ends, as well.
After you are satisfied that you have properly heated and applied the edgebanding, give it some time to cool. Ten minutes should be adequate in most circumstances.
Then, the next step is to trim off the overhang along the top and bottom edges of the edgebanding. For this, you can use an adjustable edgeband trimming tool, a flush cutter, a sharp craft knife, or even a very sharp chisel.
If using an adjustable edgebanding trimmer, set the width between the blades, apply it to the edge, squeeze the two halves together, and slide it along the edge of the piece from one end to the other. The excess will curl off behind the trimmer as you progress along the edge.
At this point, you can cut off the overhangs along the two edges that are farthest from each other; you can use a knife for this but a flush cutter is quick, easy, and precise.
Some people like to sand down the corners along the edge of the edgebanding (along the top and bottom) as this creates a nice, smooth, radiused edge; but that is your choice.

At this point, you have successfully applied your edgebanding. Now all that’s left to do is sand, stain and finish the edgebanding as desired.
For More Information, Contact Us
In addition to walnut edgebanding, we also carry a variety of domestic and exotic wood veneer edge banding tape including white rift oak, maple, birch, cherry, zebrawood, mahogany, and many others.
If you have any additional questions about backer types, application, or finishing, feel free to contact us at Info@OakwoodVeneer.com or at 800-426-6018.


