

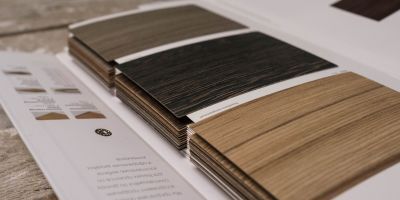


You’ve spent hours carefully laying up a gorgeous walnut, cherry, or white maple veneer sheet onto a cabinet box or table top. The surface looks incredible—completely flat, rich, and indistinguishable from solid lumber. Then, you step back and look at the edge.
If you leave a raw plywood core or a blunt substrate edge exposed, the illusion instantly shatters.
The secret to making veneered cabinetry and furniture look like high-end, solid wood construction comes down to one finishing touch: wood veneer edgebanding. Getting edgebanding right separates amateur shop projects from professional architectural millwork. Here is how to choose the right material and apply it cleanly every single time.
Step 1: Choosing the Right Type of Edgebanding
Before you start cutting and gluing, you need to match your edgebanding type to your workflow and finishing requirements.
- Pre-Glued (Iron-On) Edgebanding: The ultimate choice for quick shop jobs, on-site installations, and DIYers. It comes with a pre-applied hot-melt adhesive on the back that activates with standard household heat.
- Unfinished / Fleece-Backed Edgebanding: This version has no pre-applied glue. It requires contact cement or an automated edgebander. It’s ideal when you want absolute control over your adhesive or need to stain and finish the edge alongside the face veneer.
Pro Tip: Always make sure you are matching your edgebanding species and cut (like rift-sawn white oak or flat-cut walnut) directly to your veneer sheets so the grain direction and color undertones flow seamlessly around the corners.
Step 2: Sizing and Positioning
- Cut Overlength: Always cut your edgebanding strip about 1 inch longer than the actual edge of the board. Trimming a clean edge at the end is much easier than trying to patch a short gap.
- Center It: Align the strip along the edge of your substrate (such as MDF or plywood). Ensure an equal overhang of excess material on both the top and bottom faces.
Step 3: Activating and Setting the Bond
If you are using iron-on edgebanding, technique is everything:
- Set Your Iron: Turn your household iron to a medium-high cotton setting (avoid maximum steam heat, as moisture can disrupt the glue).
- Press and Glide: Hold the iron firmly over the edgebanding, moving steadily down the length of the board. The heat melts the underlying hot-melt glue, pulling the wood tight to the core.
- Roll While Hot: Immediately take a J-roller or a wooden smoothing block and press down hard along the hot strip. Rolling while the glue is molten forces out air pockets and locks the edgebanding permanently to the substrate.
Step 4: Trimming the Overhang Like a Pro
Once the edge has cooled for a minute, you need to clean up the top and bottom overhangs.
- Use a Specialty Trimmer: A dual-bladed edge trimmer makes quick work of slicing away excess material without gouging your core substrate.
- Clean Up the Ends: Use a sharp chisel held flat against the panel face, or a fine flush-cut saw, to carefully trim the overlength ends flush with the corners.
- Light Sanding: Take a sanding block wrapped in 150-grit paper and lightly break the sharp 90-degree corner with a single, smooth stroke. This protects the edge from chipping later and gives it a soft, tactile feel.
PRO TIP FROM THE SHOP:
If you are staining your project, apply your stain and topcoats after the edgebanding is fully trimmed and sanded. Finishing the whole assembly at once ensures the glue line virtually disappears into the surrounding wood grain.