

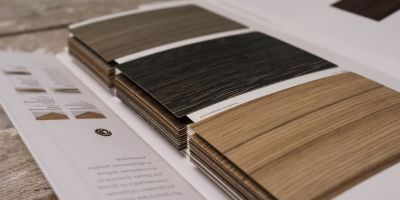
Restoring a damaged vintage veneer table or building a custom piece of wood veneer furniture requires a different approach than standard cabinet runs. Furniture surfaces take direct daily impact, hot coffee mugs, and constant surface wiping. A bad bond or uneven caul pressure on a tabletop will show up instantly under a finish coat.
Using high-quality furniture wood veneer allows you to restore heirloom pieces or build stable, lightweight custom furniture without the warping risks of solid slab tops. Here is a floor guide to selecting materials, repairing vintage surfaces, and pressing flawless veneer tops.
1. Choosing the Right Veneer & Core for Furniture Tops
Not every wood veneer sheet works for table surfaces. When building or refacing wood veneer for furniture, substrate flatness and sheet thickness are everything.
- Tabletop Substrates: Use 3/4-inch MDF or Baltic birch plywood as your core. MDF provides a perfectly flat, dead-smooth base that prevents core ghosting on large, smooth table surfaces.
- Face Veneer Thickness: For furniture tops subject to heavy sanding and daily wear, opt for premium 2-ply or paper-backed sheets. Thick face veneers allow light scuffing and refinishing down the road without burning through to the glue line.
- Backing Rules: Always press a balance sheet to the underside of tabletop panels. Gluing face veneer to only one side of a table core causes the panel to cup upwards as the glue cures.
2. Restoring Vintage Veneer Furniture: Repairing Blisters and Edges
When restoring old veneer furniture, you don't always need to tear off the entire face sheet. Common vintage repairs come down to fixing lifted edges and replacing missing flitch sections.
- Flattening Veneer Blisters: If an old table surface has a raised bubble, slice a fine slit along the wood grain using a razor knife. Inject fresh PVA wood glue under the bubble with a syringe, cover it with wax paper and a flat wooden block, and clamp tight until dry.
- Patching Damaged Edges: Clean out chipped corners using a chisel, making a clean rectangular cut. Slice matching replacement veneer strips from a similar flitch, slip-match the grain direction, and glue the patch in place before flush-sanding.
- Accent Trims & Edging: Protect table perimeter edges from chair bumps. Use solid hardwood edge bands, decorative trims like bamboo beading, or pre-glued options like band-it melamine edge banding for commercial utility desks to lock down exposed panel cores.
3. Step-by-Step: Pressing Veneer onto a Table Top
1.Surface & Sheet Prep:Prepare Core and Dry-Fit Sheet.
Sand the core board flat with 120-grit paper and blow off all dust. Cut your furniture wood veneer sheet 1 inch oversized on all sides. Dry-fit the veneer face over the core, checking grain orientation and seam alignment.
2.Adhesive Rollout:Spread Glue Evenly.
Apply cold-press PVA veneer glue or urea-formaldehyde resin glue to the core using a foam roller. Aim for a thin, even coat with no puddles or dry spots. Apply glue to both sides of the core if pressing your backing sheet simultaneously.
3.Pressing Options:Apply Even Clamping Pressure.
For small tops, use rigid wooden cauls clamped from the center outward. For large conference tables or curved dining tops, place the panel inside a vacuum press bag and pull maximum vacuum pressure (21-25 inches of Hg) for at least 45 to 60 minutes.
4.Trimming & Bench Sanding:Flush-Trim and Sand Face.
Once cured, trim the perimeter overhang using a sharp flush-trim router bit or laminate scraper. Hand-sand the face lightly with a flat sanding block using 180-grit paper, working strictly with the grain to prepare for stain or clear coat.
Furniture Edge & Surface Comparison Matrix
|
Application Method |
Edge Protection Level |
Restoration Effort |
Ideal Furniture Project |
|
2-Ply Wood Face + Solid Hardwood Edge |
Maximum (High impact resistance) |
High (Requires router profiling) |
Custom dining tables, executive desks, coffee tables |
|
Paper-Backed Face + Veneer Strips |
Moderate (Clean, low-profile seam) |
Moderate (Flush trimming required) |
Side tables, dressers, credenzas, nightstands |
|
Commercial Banding (Band-It Melamine / PVC) |
High (Water-resistant utility edge) |
Low (Fast heat-on application) |
Utility furniture, shop workbenches, office desks |
|
Decorative Trim (Bamboo Beading / Moulding) |
Moderate to High (Decorative barrier) |
Moderate (Requires precision miter cuts) |
Accent tables, boho cabinetry, vintage reproduction builds |
The Shop Bottom Line
Building or restoring veneer furniture requires steady prep work and uniform press pressure, but it lets you create high-end, stable table tops that outlast solid wood slabs. By pairing flat MDF cores with balanced backing sheets, cleanly patching damaged veneer table edges, and protecting panel perimeters with proper edging, you deliver heirloom-quality furniture that stays flat for generations.