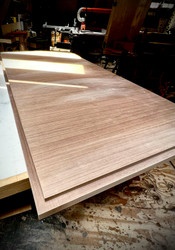
Peel and Stick Wood Veneer also known as self adhesive veneer or sticky back veneer is a modern, convenient type of veneer that comes with a self-adhesive backing, eliminating the need for additional glue during application. It's made from a thin layer of natural wood or engineered wood attached to a paper or fabric substrate, with an adhesive layer protected by a peelable paper sheet.
Key Features of Peel and Stick Wood Veneer
- Ease of Application:
- The adhesive backing simplifies installation, making it a great choice for DIY projects.
- Simply peel off the protective backing and stick the veneer onto the desired surface.
- Real Wood Finish:
- Most peel and stick veneers are made from real wood, providing the natural grain and warmth of wood.
- Thin and Flexible:
- Its thin and flexible structure makes it easy to apply to flat or slightly curved surfaces.
- Variety of Options:
- Available in various wood species, colors, and grain patterns, allowing for customization to match your decor.
- No Mess or Specialized Tools:
- Since glue isn't required, there's less mess. A utility knife, straight edge, and roller are typically all you need for installation.
Uses of Peel and Stick Wood Veneer
- Furniture Makeovers:
- Update old furniture like cabinets, dressers, or tables with a fresh veneer layer.
- Home Decor Projects:
- Add a natural wood finish to walls, headboards, shelves, or decorative panels.
- Crafting:
- Used for smaller projects like creating coasters, photo frames, or decorative accents.
- Cabinet Refacing:
- Ideal for giving cabinets in kitchens or bathrooms a new look without the cost of replacing them.
Advantages
- Time-saving: Quick and easy to apply.
- Cost-effective: Provides a high-end wood look without the expense of solid wood.
- Durable: When properly applied, it can last for years.
- Customizable: Easy to trim to size with basic tools.
Tips for Applying Peel and Stick Veneer
- Prepare the Surface:
- Ensure the surface is clean, smooth, and dry. Sand rough areas if needed.
- Measure and Cut:
- Measure the area accurately and cut the veneer slightly larger than required. Trim excess after application.
- Peel and Align:
- Peel back a small portion of the backing, align the veneer, and press it onto the surface gradually.
- Smooth Out Bubbles:
- Use a squeegee or a block with a tight radius to smooth out air bubbles and ensure proper adhesion.
- Seal for Longevity:
- For added durability, consider applying a clear finish or sealer over the veneer.
Limitations
- Not Suitable for Uneven Surfaces: Requires a smooth base for proper adhesion.
- Repositioning: Once applied, it can be repositioned up to 1 hour after application.
- May Not Handle High Moisture: Excess moisture can weaken the adhesive or cause the veneer to peel.
Peel and stick wood veneer is a versatile, user-friendly option for giving surfaces a natural wood look without extensive effort or expense. Let me know if you'd like tips on choosing the right one for your project!


