

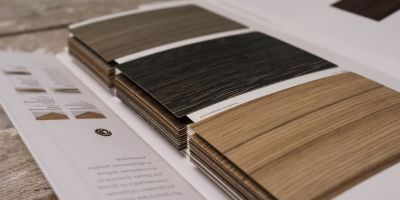

Many people choose wood veneer for its cost-effectiveness and stability, but the ultimate goal is almost always to achieve the deep, rich, and natural look of solid lumber. Whether you're finishing white oak veneer or a dark walnut veneer, the key lies in enhancing the natural grain and building depth without creating a "plastic" look.
Because wood veneer sheets are real wood, they respond beautifully to professional finishes—but because they are thin (typically 10-20 mil), your technique must be precise to ensure a high-end result on your veneer panels.
Step 1: Prepare the Surface (The Sanding Golden Rule)
Proper surface preparation is the foundation of a high-end finish. However, the most common shop failure with veneer wood sheets is "burn-through"—sanding through the thin face wood into the glue layer.
-
Avoid Power Sanders: On thin veneer wood sheets, we recommend hand sanding only. A random orbit sander can create localized heat that softens the veneer glue, leading to bubbling or delamination.
-
Grit Selection: Start with 150-grit and finish with 220-grit. Sanding higher than 220 can actually burnish the wood fibers, causing the stain to sit on top rather than soaking in, which kills the depth of the finish.
-
The Raking Light Test: Before applying any finish, inspect your work under a raking light (a light held at a low angle). This will reveal any hidden glue spots or scratches that will be magnified once the stain is applied.
Step 2: Choose the Right Finish for Depth
To make veneer panels look indistinguishable from solid wood, you need a finish that "wets" the fibers and pops the grain character.
-
Oil-Based Stains: These are the gold standard for depth. They soak into the open pores of species like white oak veneer, highlighting the character of the wood grain.
-
Gel Stains: If you are working with a species prone to splotching, gel stains sit slightly higher on the surface, giving you more control over the "richness" of the color without the muddy look of cheap hardware store stains.
-
Hardwax Oils: For a modern "Mountain Modern" look, hardwax oils provide a hand-rubbed feel that feels exactly like solid timber under the hand.
Step 3: Application & The Zero-Glare Topcoat
Applying the finish is where you build the "depth" that mimics a heavy plank.
-
Thin Layers: Always apply multiple thin coats rather than one heavy one. This allows you to control the color and prevents moisture from overwhelming the veneer bond.
-
Sanding Between Coats: Lightly "scuff sand" with 320-grit between topcoats to remove dust nibs. This ensures a surface that is perfectly smooth to the touch.
-
The Low-Glare Choice: To truly appreciate the wood grain, avoid high-gloss finishes. High gloss creates a harsh glare that hides the natural beauty of the grain. A Satin or Matte topcoat diffuses light, making the wood look deeper and more authentic.
Conclusion
Achieving a professional, solid-wood look on wood veneer sheets is all about patience and choosing finishes that respect the natural grain. By focusing on light hand-sanding and low-glare topcoats, you can create veneer panels that serve as the centerpiece of any high-end project.
Ready to start your next project? Browse our selection of over 400 wood veneer species or call our expert shop team for finishing advice.