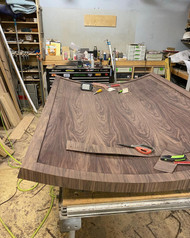
How to Apply Wood Veneer Like a Pro
Sep 5th 2024
Applying wood veneer like a pro requires attention to detail, the right tools, and a systematic approach. Here’s a step-by-step guide to help you achieve a professional finish:
Materials and Tools Needed
- Wood veneer sheets
- Veneer adhesive (contact cement or wood glue)
- Veneer tape or masking tape
- Roller or veneer scraper
- Utility knife or veneer saw
- Sandpaper (various grits)
- Clamps (if using wood glue)
- Clean cloth
- Protective finish (e.g., varnish, lacquer, or polyurethane)
Steps to Apply Wood Veneer
1. Prepare the Surface
- Clean and Smooth: Ensure the surface to be veneered is clean, smooth, and free of dust or debris. Sand the surface if necessary to create a smooth base.
- Flat and Stable: The surface should be flat and stable to ensure proper adhesion.
2. Cut the Veneer
- Measure and Mark: Measure the area to be covered and mark the veneer accordingly.
- Cut: Use a sharp utility knife or veneer saw to cut the veneer slightly larger than the surface area. This allows for trimming later.
3. Apply the Adhesive
- Contact Cement: Apply a thin, even layer of contact cement to both the substrate and the back of the veneer. Allow the cement to dry to a tacky state (as per manufacturer’s instructions) before joining the surfaces.
- Wood Glue: Apply a thin layer of wood glue to the substrate. Place the veneer on the glue, and then use a roller or scraper to press the veneer firmly into place.
4. Position and Adhere the Veneer
- Align and Press: Carefully align the veneer with the substrate. Start at one edge and press down, smoothing out any air bubbles or wrinkles as you go.
- Roll or Scrape: Use a roller or veneer scraper to press the veneer firmly onto the substrate, working from the center outwards to ensure even adhesion.
5. Trim the Edges
- Trim Excess: Once the veneer is adhered, use a sharp utility knife or veneer saw to trim any excess veneer along the edges of the substrate.
- Smooth Edges: Sand the edges lightly to smooth any rough spots and ensure a clean finish.
6. Tape Seams (if applicable)
- Veneer Tape: Use veneer tape or masking tape to hold seams or joints in place while the adhesive sets. This helps prevent gaps or shifting.
7. Clamp and Cure
- Clamp: If using wood glue, use clamps to hold the veneer in place while the glue dries. Use cauls (flat, smooth boards) between the clamps and the veneer to distribute pressure evenly.
- Cure: Allow the adhesive to cure completely as per the manufacturer’s instructions. This ensures a strong bond.
8. Finish the Surface
- Sand: Lightly sand the veneered surface with fine-grit sandpaper to smooth out any imperfections and prepare it for finishing.
- Clean: Wipe the surface with a clean cloth to remove any dust or debris.
- Apply Finish: Apply a protective finish such as varnish, lacquer, or polyurethane to enhance the appearance and durability of the veneer. Follow the manufacturer’s instructions for application and drying times.
Tips for Success
- Temperature and Humidity: Work in a controlled environment with stable temperature and humidity to prevent the veneer from warping or bubbling.
- Sharp Tools: Ensure all cutting tools are sharp to make clean, precise cuts.
- Patience: Take your time with each step to ensure accuracy and avoid mistakes.
- Practice: If you’re new to veneering, practice on scrap pieces before working on your final project.
By following these steps and tips, you can achieve a professional-quality veneer application that enhances the beauty and functionality of your woodworking projects.
